Disputes in Dashboard
Manage your disputes in the Lithic Dashboard.
Lithic clients can manage their disputes via the Disputes API, Lithic Dashboard, or both. In Lithic Dashboard, you can:
- Manage disputes: Submit, modify, and withdraw your disputes and dispute evidence directly in Dashboard.
- Browse and export disputes: Browse your existing disputes in Dashboard and export them if you need to do a deeper dive.
Accessing Disputes in Dashboard
To access Disputes, click Disputes in the navigation bar. This page contains a list of all your Disputes. Please note that while all clients have access to Disputes, you'll need a specific permission to begin to initiate disputes. Speak to your customer success or implementation manager for more detail.

Submitting a Dispute in Dashboard
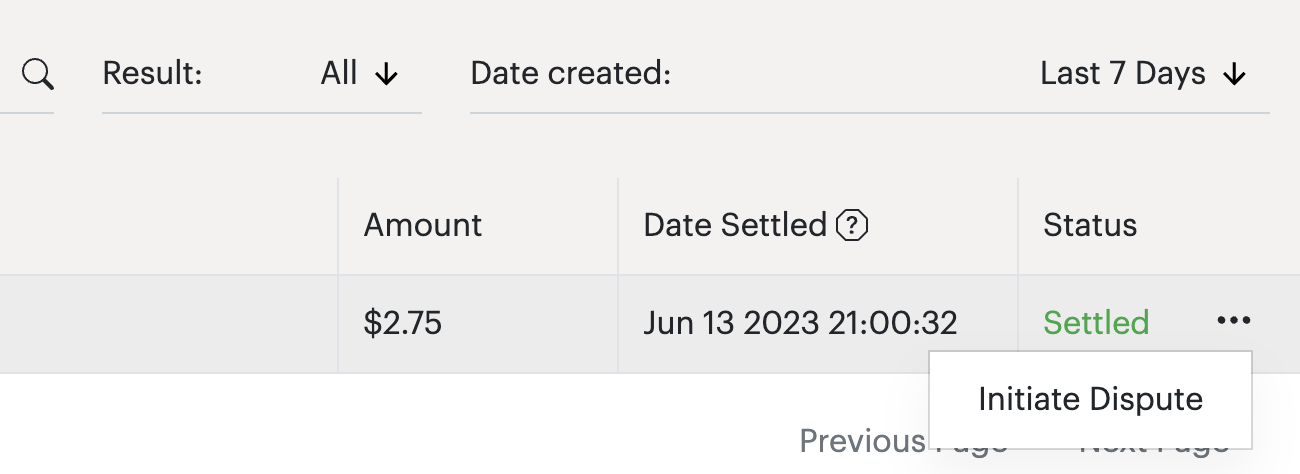
To initiate a Dispute, go to Transactions. You can initiate a Dispute for a transaction either from the Transactions table (by clicking the three dots menu) or from the Transaction Detail page (you'll see a Dispute button under your account icon on the top right):
Please note Lithic cannot submit more than 15 fraud-related disputes over the lifetime of a card according to network rules.

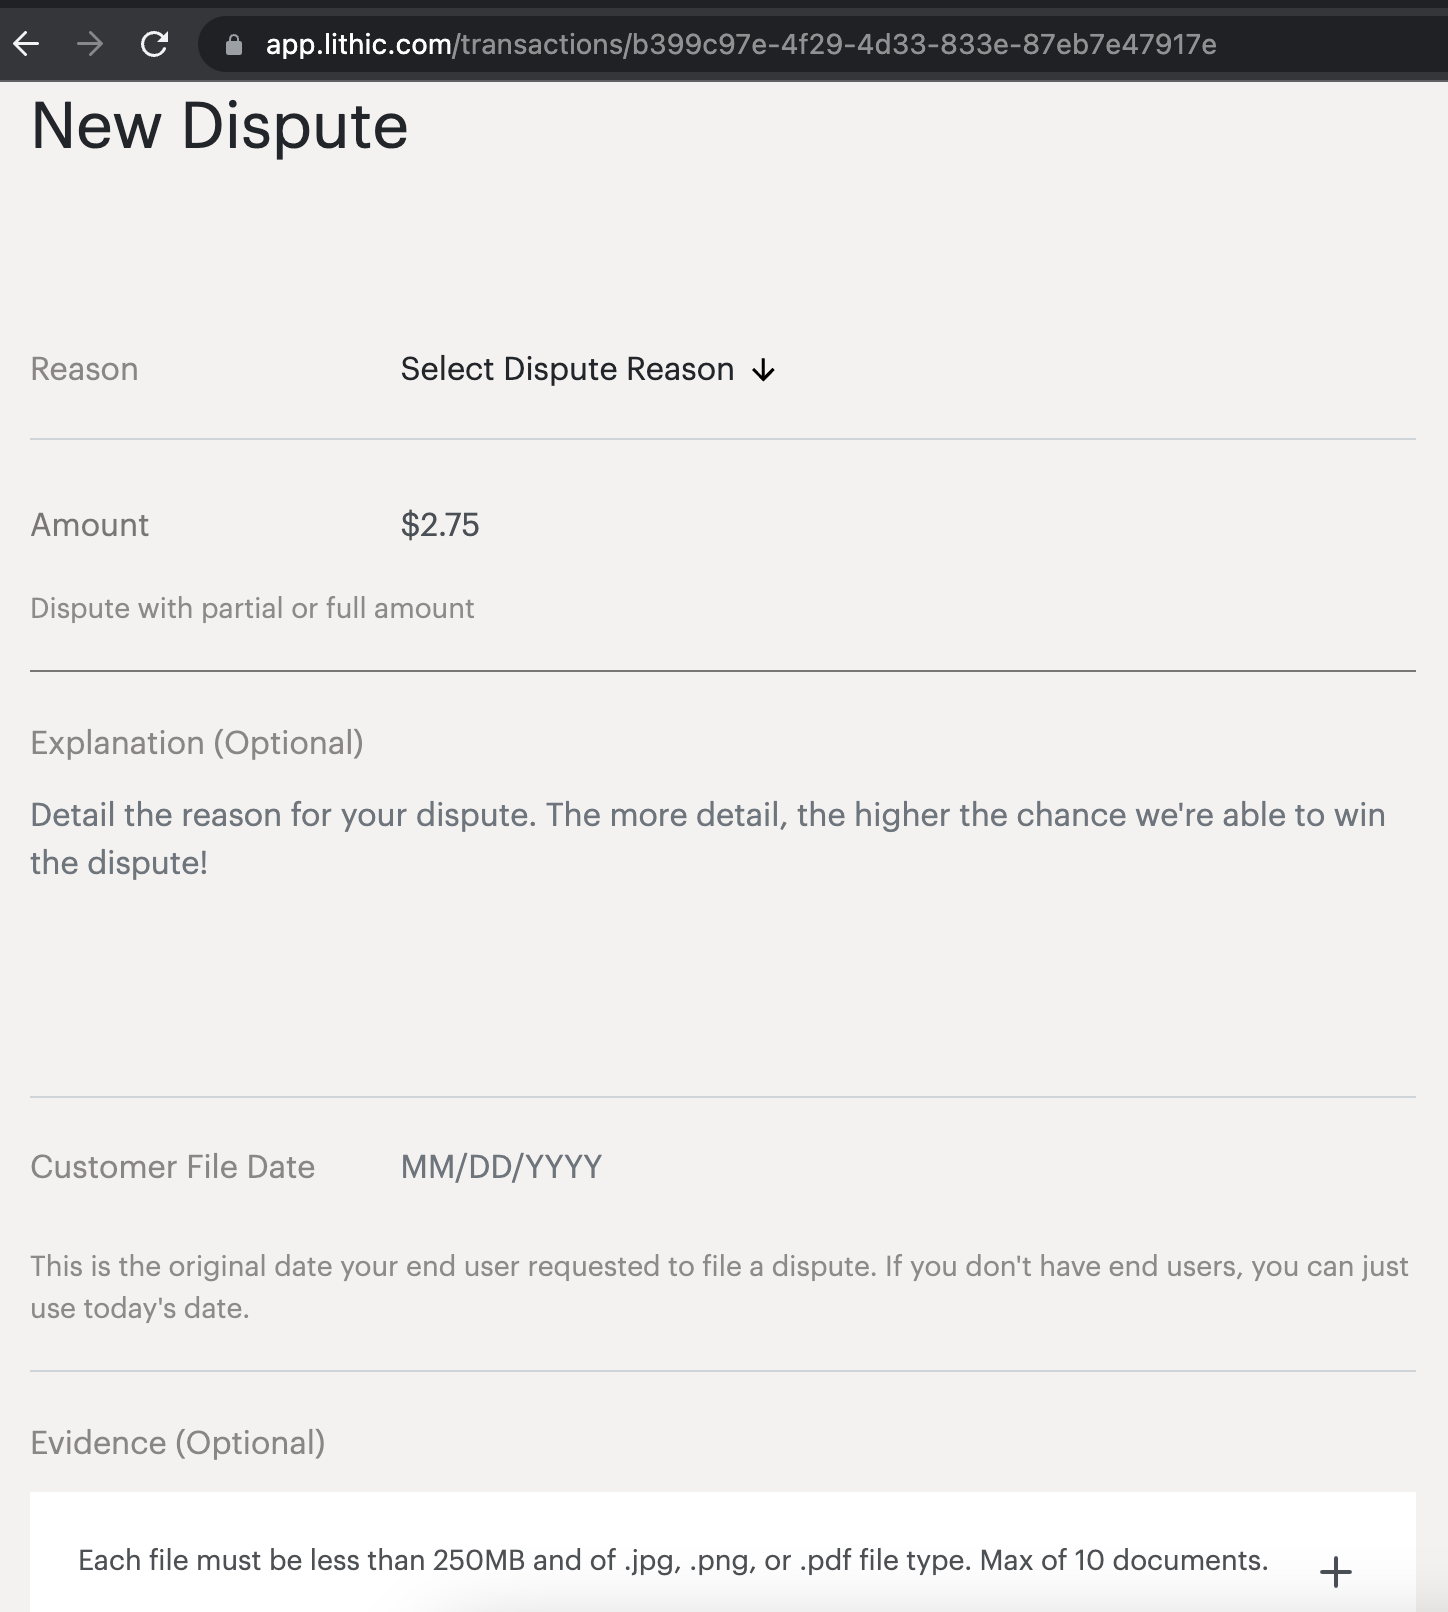
Initiating a dispute will bring up a modal for you to submit information about your dispute. In the modal, you'll submit:
- Reason: Why the transaction is being disputed.
- Amount: How much is in dispute. This can be the whole amount or a partial amount (if you bought several items in a single purchase and only wanted to dispute one of them, for example).
- Explanation: An explanation of why you or the end user wanted to dispute the transaction. We highly encourage you to submit and/or request as detailed an explanation as possible to increase your chance of winning the dispute and recouping the disputed amount.
- Customer File Date: When you or the end user first initiated the dispute. If you have end users, this will be the day they notified you they want to initiate a dispute. If you don't have end users and are issuing cards to yourself, just enter today's date.
- Evidence Upload: Any evidence (receipts, pictures) that support your dispute. We highly recommend prompting your end users for any evidence they may have to support your dispute.
Managing Disputes in Dashboard
Once you've submitted your dispute, you'll be able to access it in three ways:
- By clicking the temporary View Dispute button that appears on the bottom left of your screen right after you submit your dispute.
- By clicking View Dispute from the Transaction Detail page of the transaction in dispute.
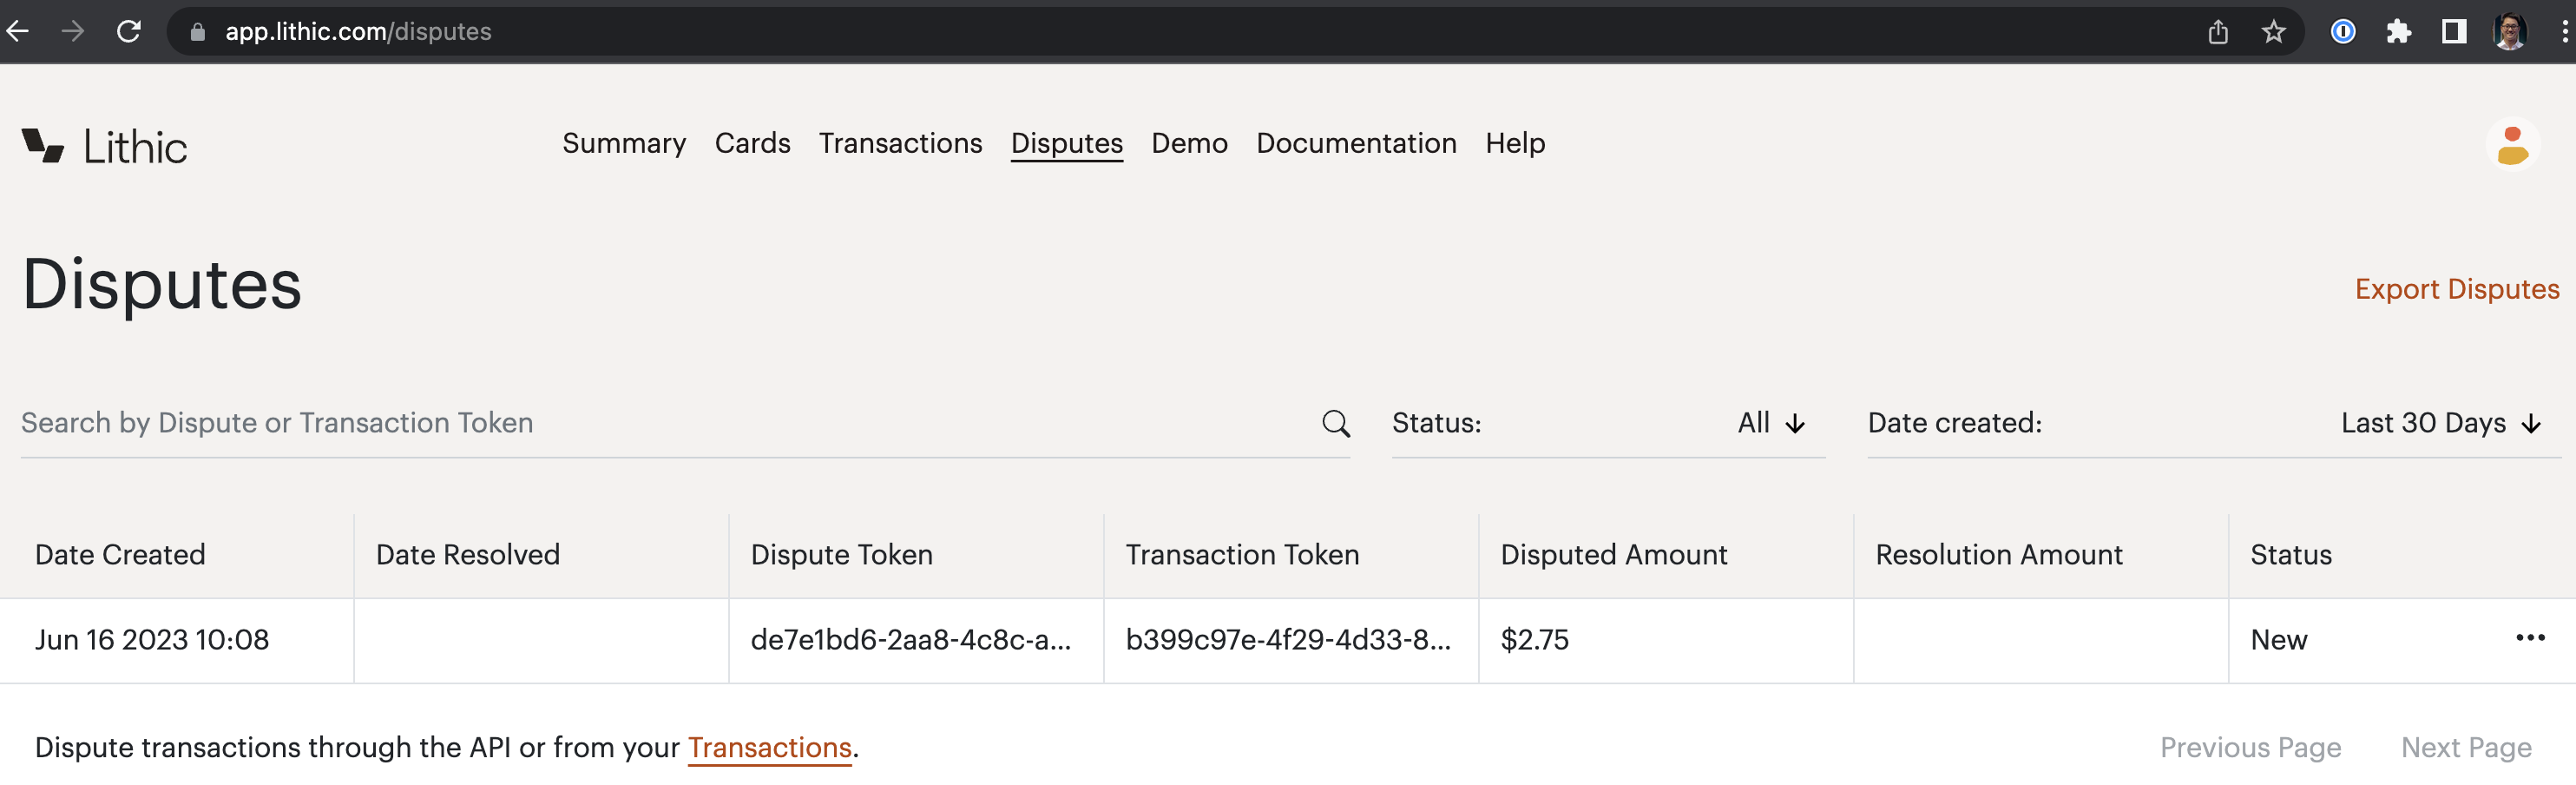
- By going to the Disputes table using the navigation bar.
From the Disputes table, you can:
- Browse your disputes. Search for a specific dispute with the dispute token or the transaction token.
- Filter disputes. You can filter by the status of the Dispute or the date it was created. See our Disputes API documentation for information of how a Dispute moves through statuses.
- Export your disputes. Clicking this will allow you to download up to 1,000 disputes that match your current search filters.
- See a Dispute's details. As in the Transactions and Cards tables, clicking on any dispute's row will bring you to its Detail page. See Dispute Details/Editing a Dispute.
- Withdraw a dispute. You can withdraw a dispute from its Detail page or using the three buttons menu under Status in the disputes table.
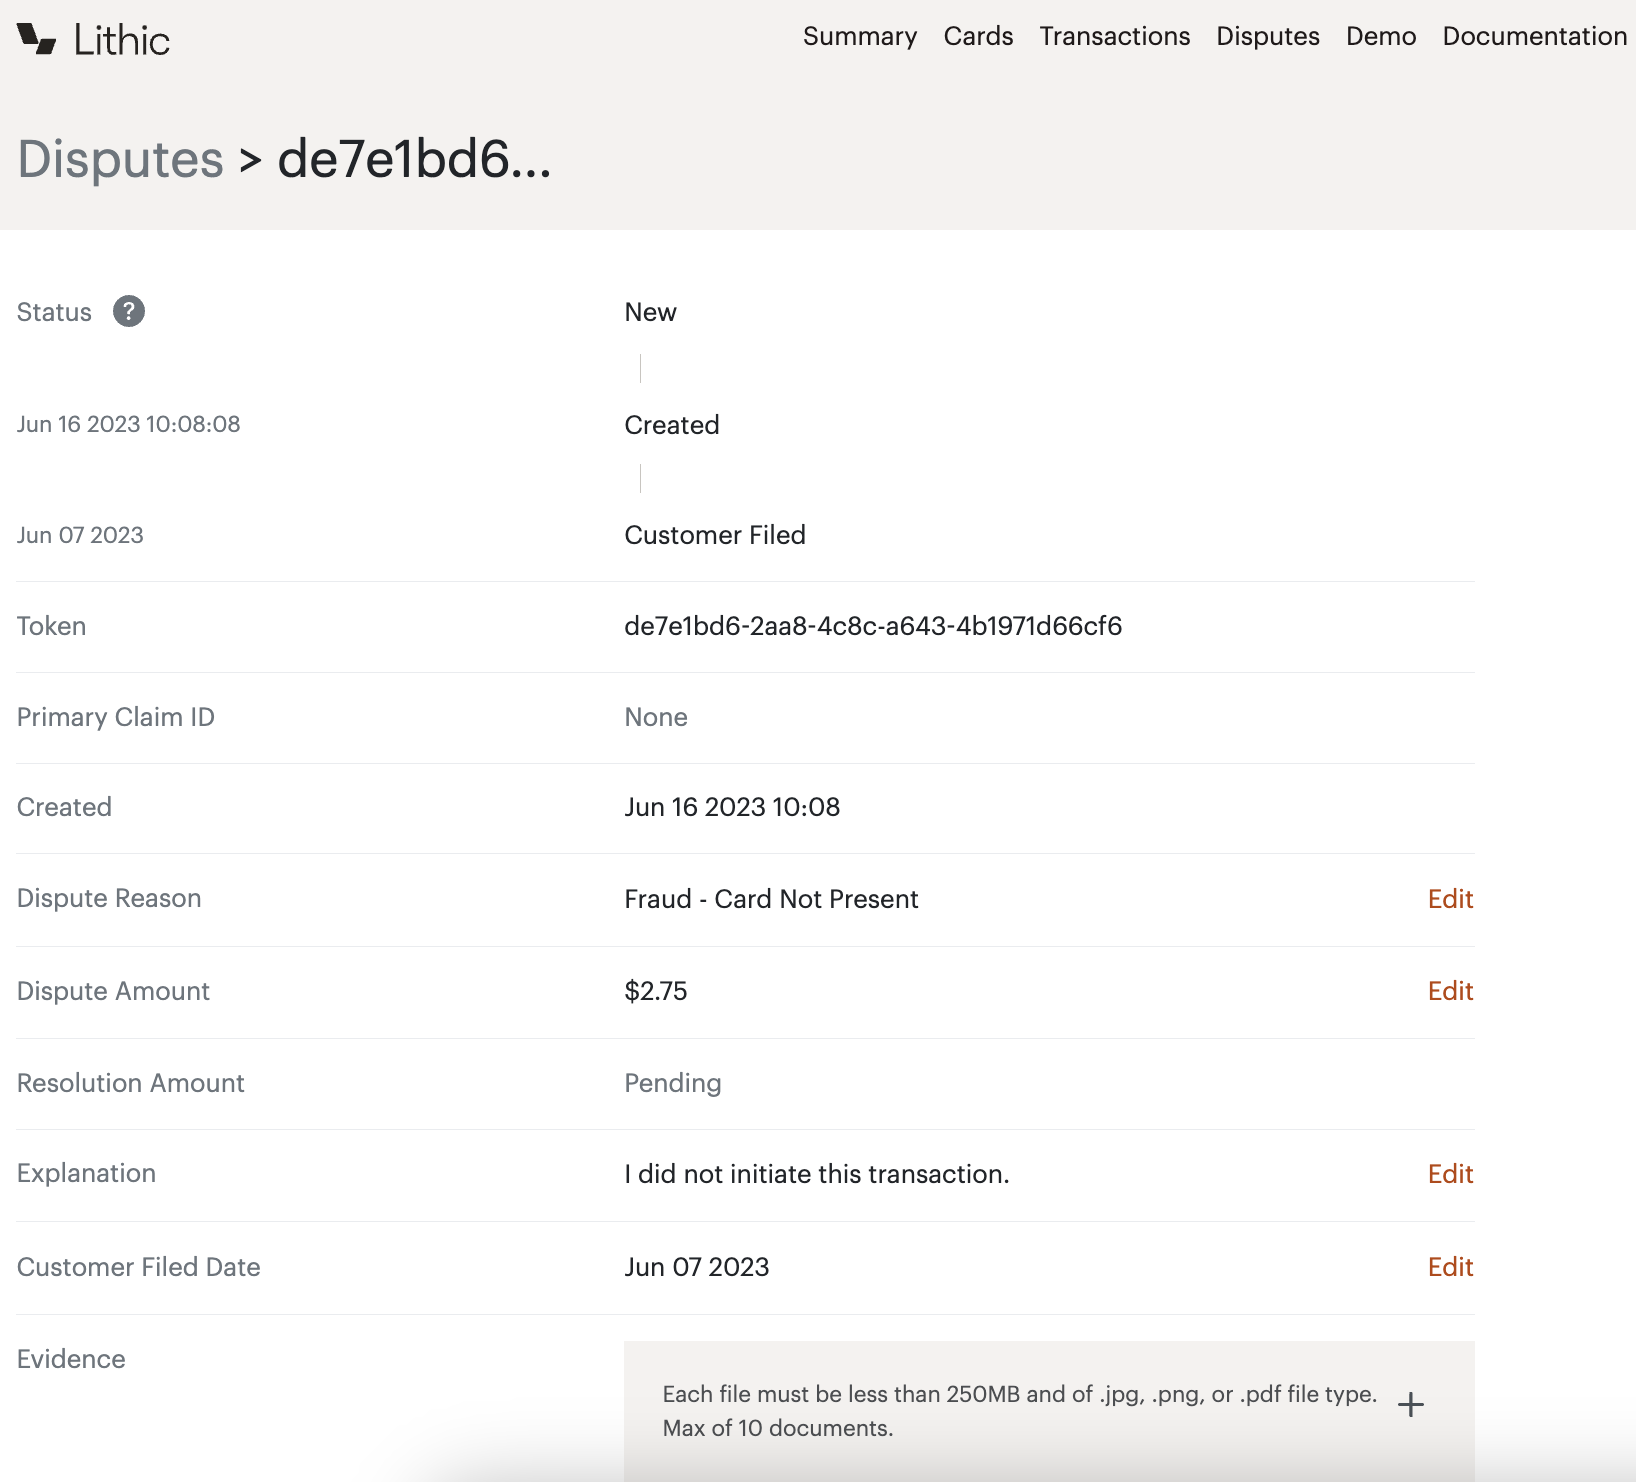
Dispute Details/Editing a Dispute
In the dispute detail page (click on any dispute's row to access), you'll find a host of information about each dispute, including its history. You can also modify a Dispute's details prior to pre-arbitration to add evidence or beef up an explanation, for example.
Please also note that Disputes cannot be edited after they have reached Submitted status via Dashboard. Reach out to our Support team to edit disputes that have already been submitted to Mastercard or Visa.
Withdrawing a Dispute
Once you've submitted a dispute, you can also choose to withdraw it. Please note that withdrawing a transaction is irreversible and you will not be able to submit a new dispute for that transaction.
Please also note that Disputes cannot be withdrawn via Dashboard after they have reached Submitted status. Reach out to our Support team to request withdrawal for disputes that have already been submitted to Mastercard or Visa.

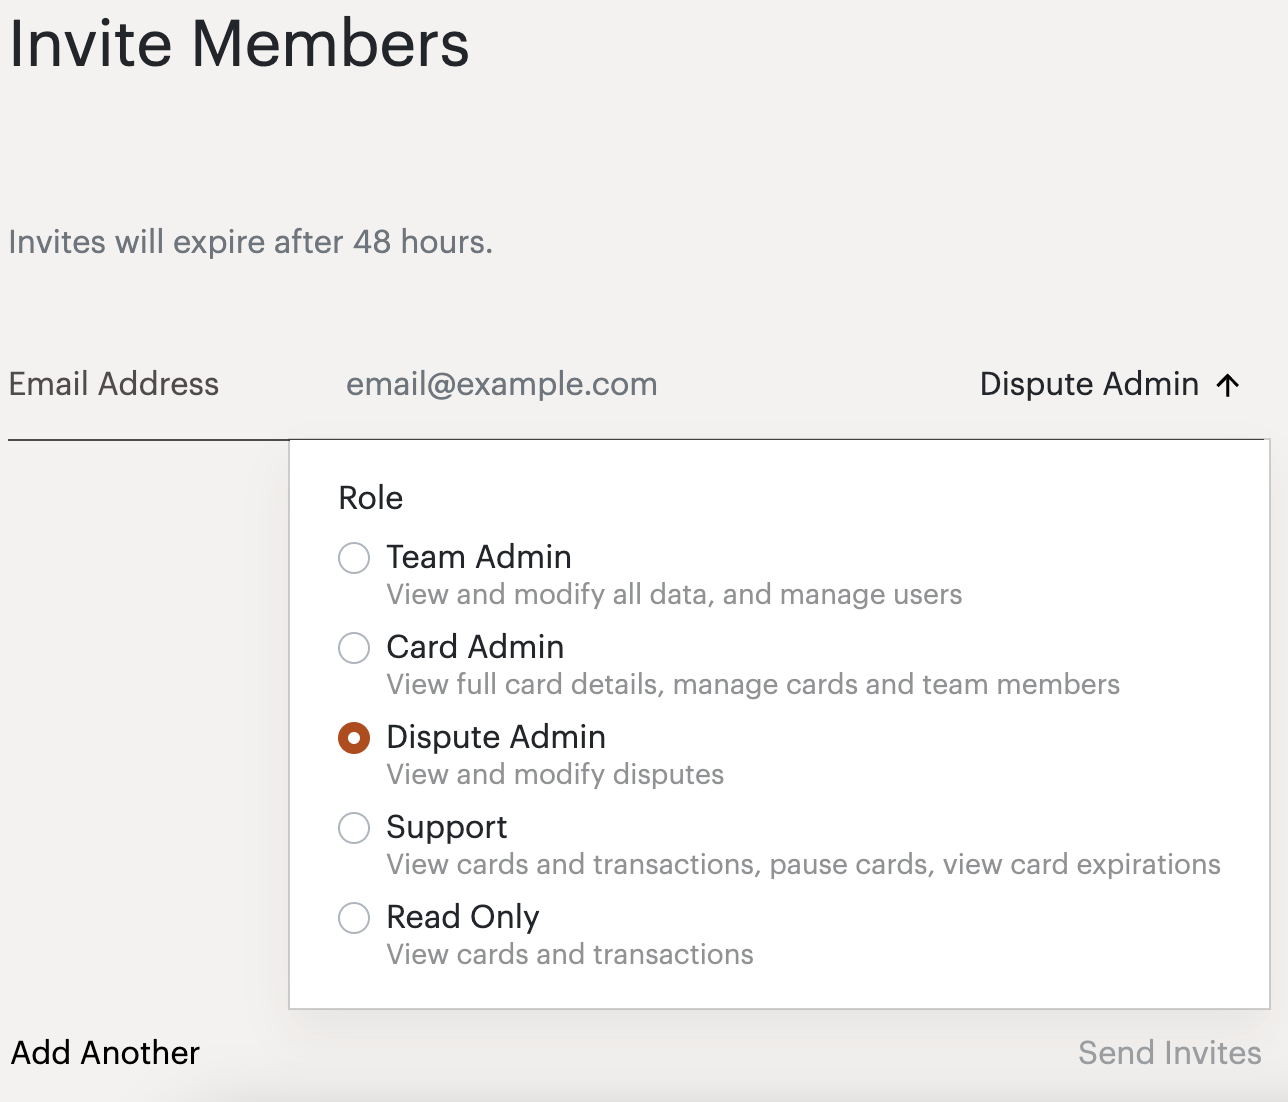
Inviting a Dispute Admin
You can invite team members as Dispute Admins. Dispute Admins have the ability to submit, edit, and withdraw disputes. Note that Team Admins have a superset of Dispute Admins' permissions and all invited team members have read-only access to Disputes.
To invite a team member as a Dispute Admin, go to Settings (via the account icon on the top right of your Dashboard) and, in the Member section, click Invite Team Members. The below modal should appear. Submit the email address of the team member you want to invite as a Dispute Admin and click Send. This will send them an email invite; they'll have to accept that invite to join your team.